Unlock Realistic Nose Drawing: Your Step-by-Step Guide
Learning how to draw a face can feel like a big project, and often, the nose seems like one of the trickiest parts. Many people find themselves wondering how to make this central facial feature look just right, whether they are aiming for something lifelike or a bit more playful. It is a common point where aspiring artists might feel a little stuck, you know?
But honestly, getting better at nose drawing does not have to be a big mystery. This important part of a face can be learned in just a few simple steps, and you can really get the hang of it. We are going to explore how to create a variety of nose shapes, using methods that are easy to follow and understand, so.
This guide will help you discover the basic parts of the nose, how to build it up, and even how the surface directions work for drawings that look real or have a nice style. You will learn how to draw a nose from different angles and perspectives with this helpful tutorial, too. It is all about breaking things down into smaller, more manageable pieces, which is that.
Table of Contents
- Getting Ready: Your Drawing Essentials
- Understanding the Nose Basics
- Drawing Noses from All Angles
- Bringing Your Nose to Life with Shading
- From Realistic to Stylized Noses
- The Importance of Practice
- Conclusion
- Frequently Asked Questions About Nose Drawing
Getting Ready: Your Drawing Essentials
Before you even make your first mark, it is really good to have everything you might need right there with you. Being well-prepared just makes the whole process smoother, you know? You want to make sure your drawing session is comfortable and that you have the right tools at hand, which is that.
For nose drawing, or any drawing really, some basic items are quite helpful. You will want some drawing paper, which can be any kind you like to use. Then, drawing pencils are a must; having a few different hardness levels can be good, like an HB for general sketching and a softer B or 2B for darker areas, you see. An eraser is also very important for fixing little mistakes or for lifting out highlights later, very.
A ruler can be surprisingly useful, especially when you are trying to keep things straight or measure proportions, so. And a ballpoint pen can be fun for outlining or adding crisp details once you are happy with your pencil work. Having these things ready means you can focus entirely on the drawing itself, and not worry about running to find something, you know?
Understanding the Nose Basics
Getting to grips with the fundamental building blocks of the nose is a really big step in making your drawings look believable. It is about seeing the nose not just as one solid thing, but as a collection of simpler shapes that work together, you know. This way of looking at it helps break down something that seems complicated into parts you can easily manage, that is.
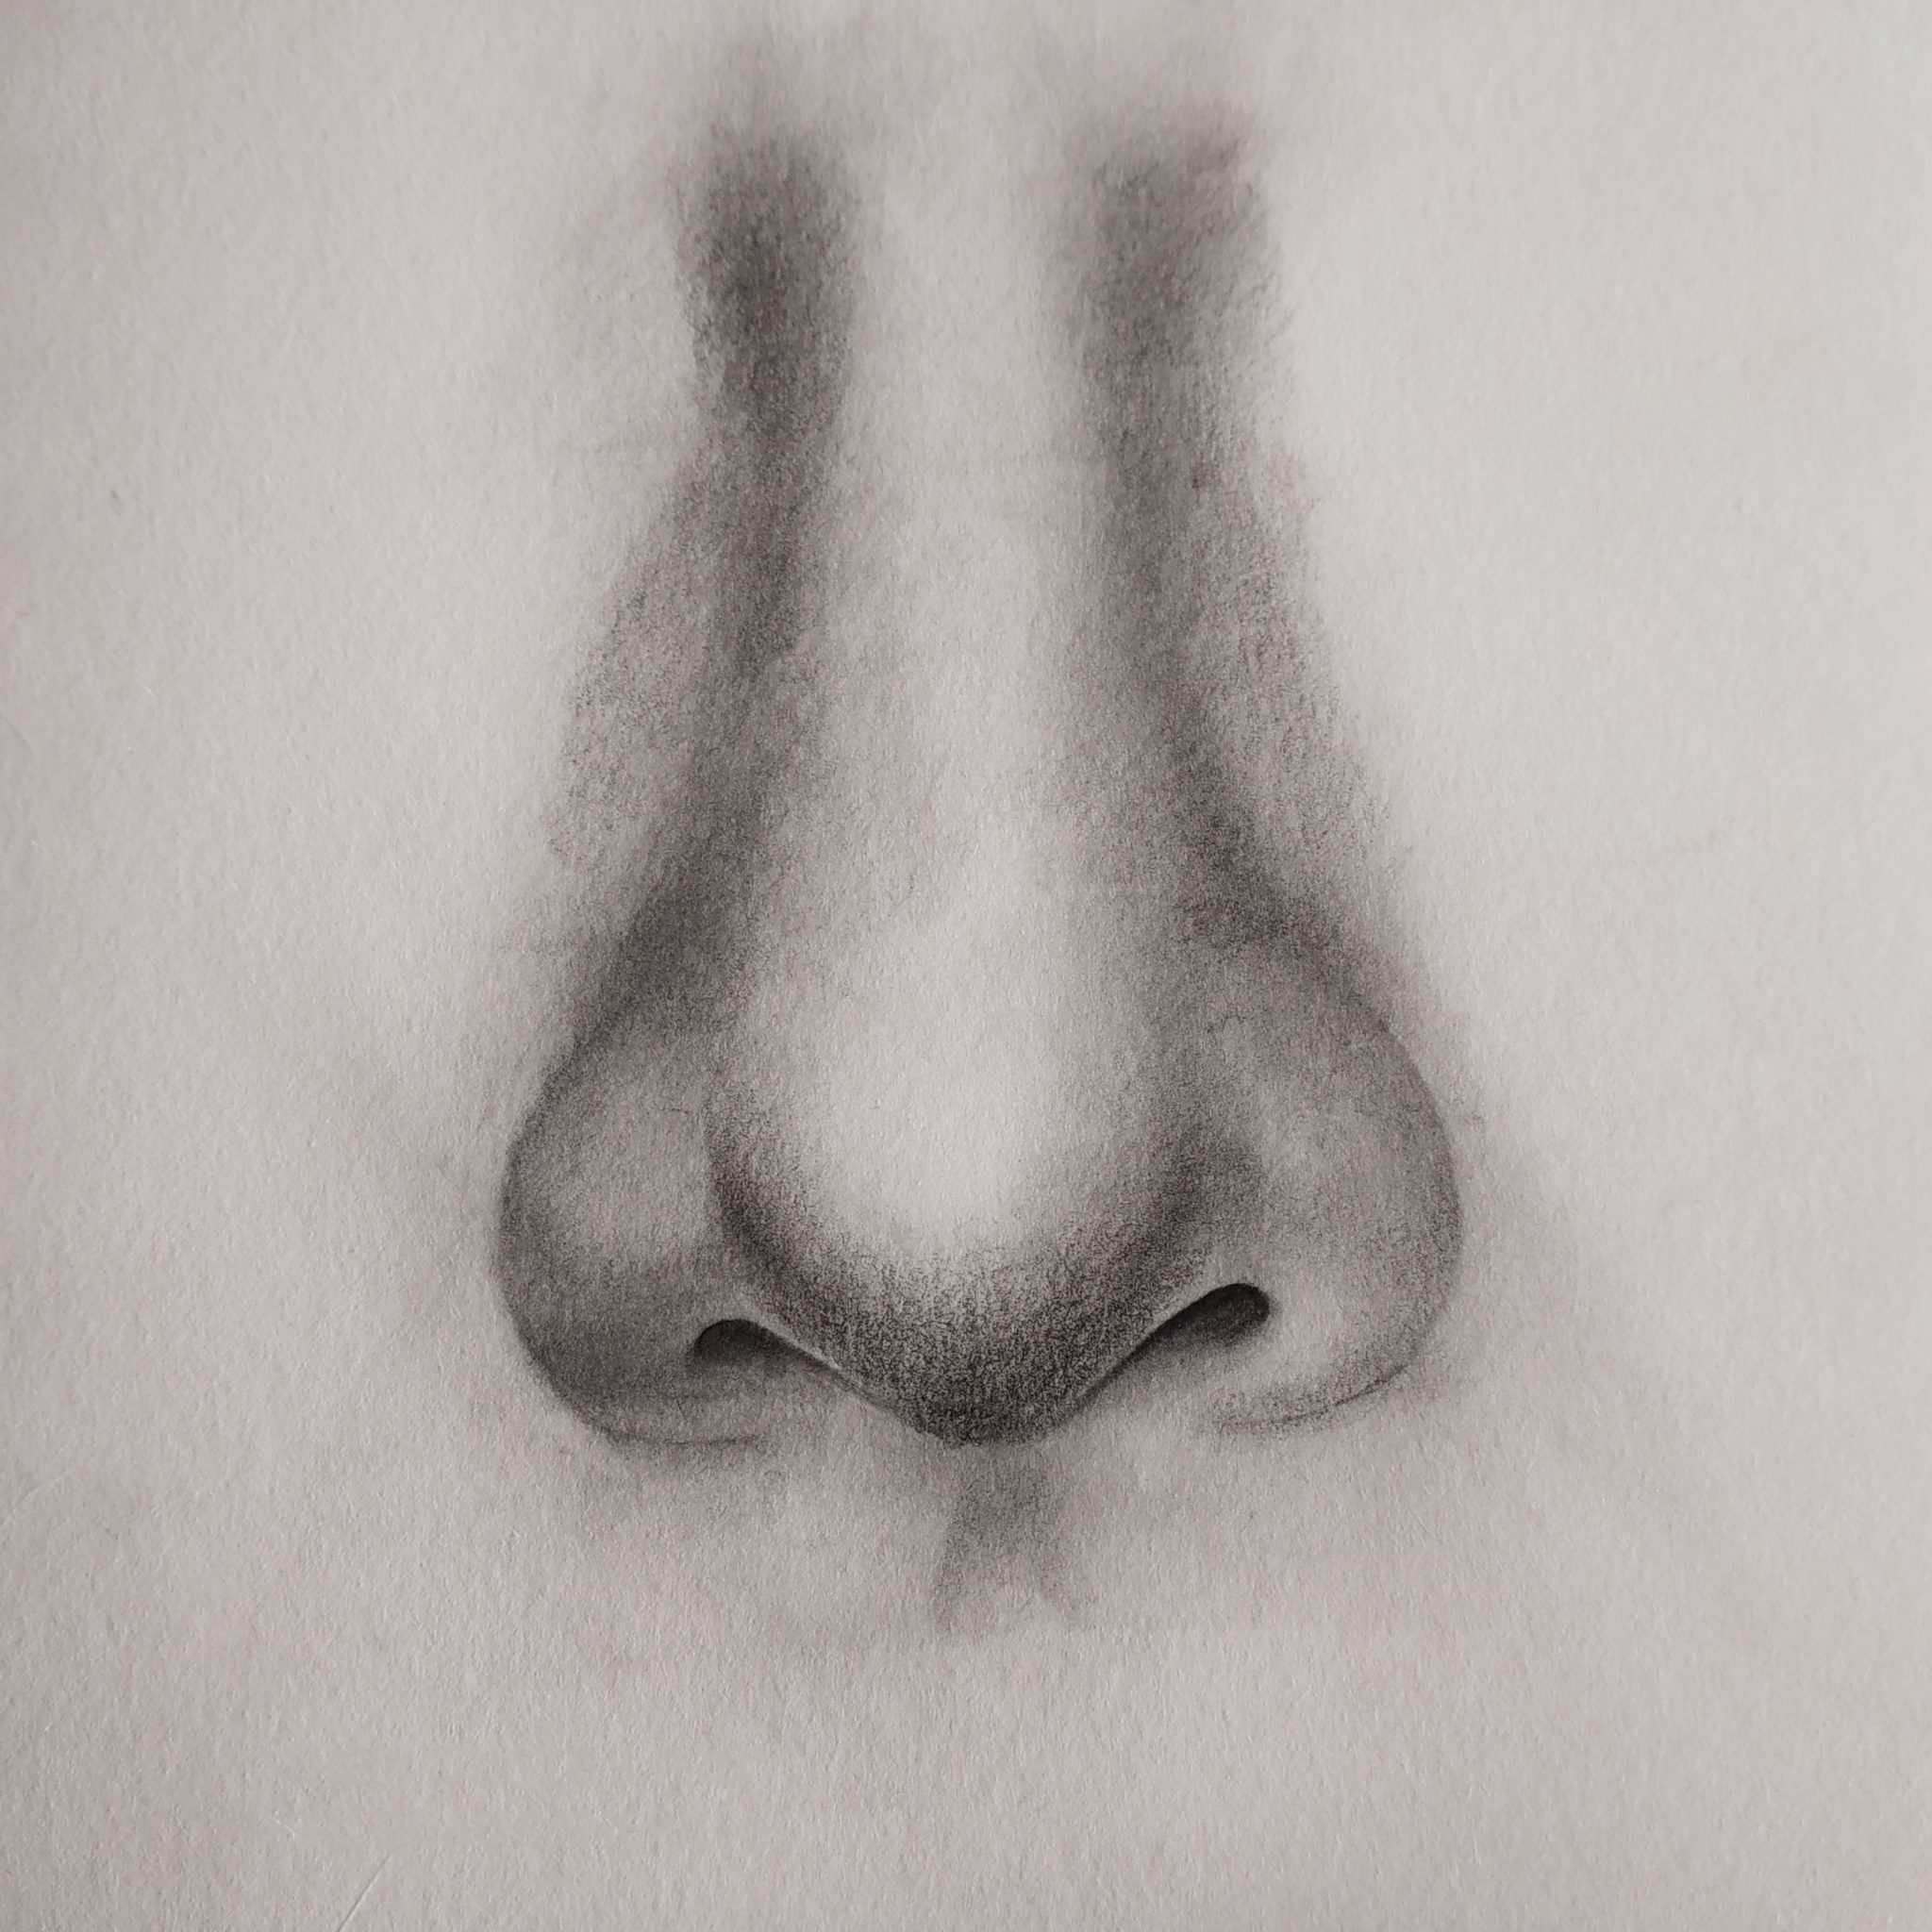
The Parts of the Nose
The nose, in a way, has a few key areas that are good to know about. There is the nose tip, which is the very end of it, sort of. Then you have the bridge, which runs down from between the eyes, you see. The nostrils are those openings, and the wings of the nose are the fleshy parts on either side of the nostrils, basically. Knowing these basic parts helps you place things correctly on the face, which is very helpful.
When you learn about these different sections, it helps you understand how light and shadow will fall on the nose, too. Each part catches light or creates a shadow in a unique way, and recognizing this makes your drawings have more depth. It is really about seeing the nose as a three-dimensional object, rather than just a flat shape, you know?
Starting with Simple Shapes
A great way to begin drawing a nose is by starting with a simple circle for the nose tip. This might seem a bit too easy, but it is a powerful first step, honestly. This circle acts as a anchor point, giving you a clear spot to build everything else around, which is that.
From this initial circle, you can then add bridge lines. These are lines that come down from the brow area, helping to define the top part of the nose. You also adjust horizontal lines for shape diversity, meaning you can make the nose wider or narrower by changing where these lines go. This basic approach helps you get the overall size and placement right from the start, you know?
It is like building with blocks, really. You begin with the biggest, most basic shapes, and then you gradually add more detail. This method makes the whole nose drawing process much less scary, and it gives you a solid framework to work with, which is quite nice.
Building the Nose Structure
Once you have your basic shapes down, you can start to think about the construction of the nose. This means understanding how those simple shapes connect and form the overall form. It is about seeing the nose as having different planes, like the flat sides of a box, sort of. These planes catch light and shadow differently, and that is what gives the nose its shape and presence, you know?
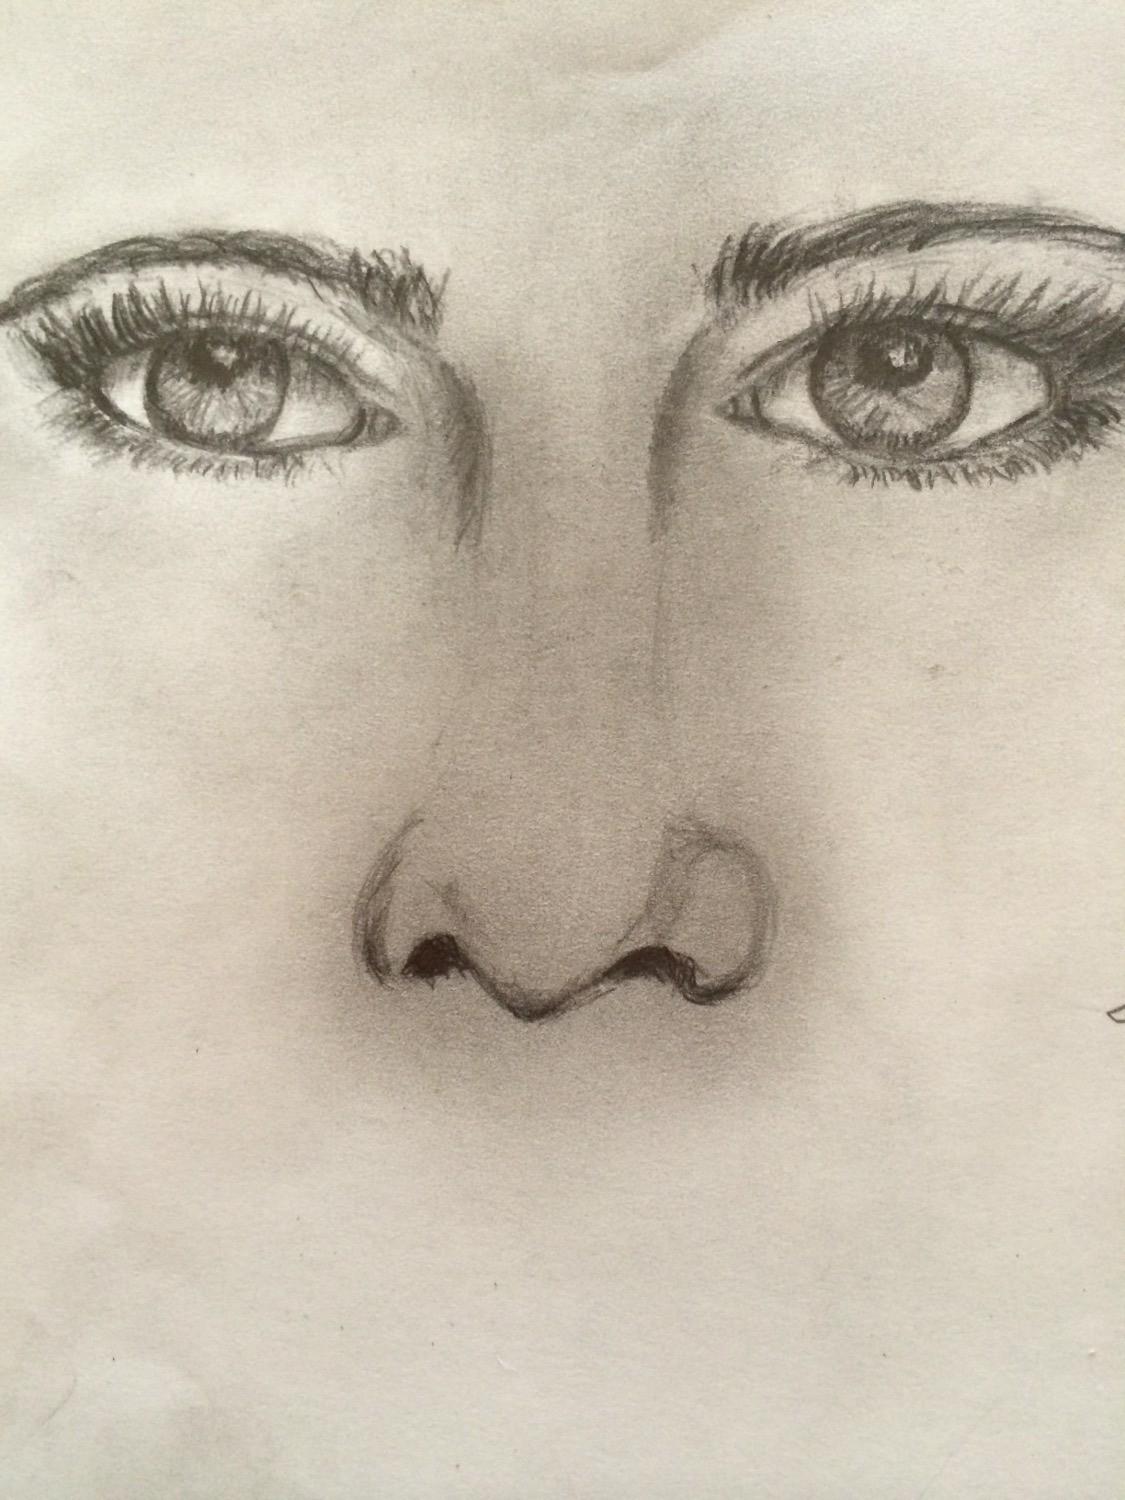
The tutorial you are following helps you with this, showing how to sketch the shape and build up the structure. It is not about drawing perfect lines right away, but about finding the main forms first. You can also compare the nose with the eyes, which helps with getting the proportions right for the whole face. This comparison is a really handy trick for making sure everything fits together nicely, you see.
So, you are essentially creating a kind of simple sculpture on your paper. You are defining the major surfaces and how they turn in space. This foundational understanding is very important for making noses that look like they belong on a real face, or at least a face that feels solid and believable in your drawing, you know?
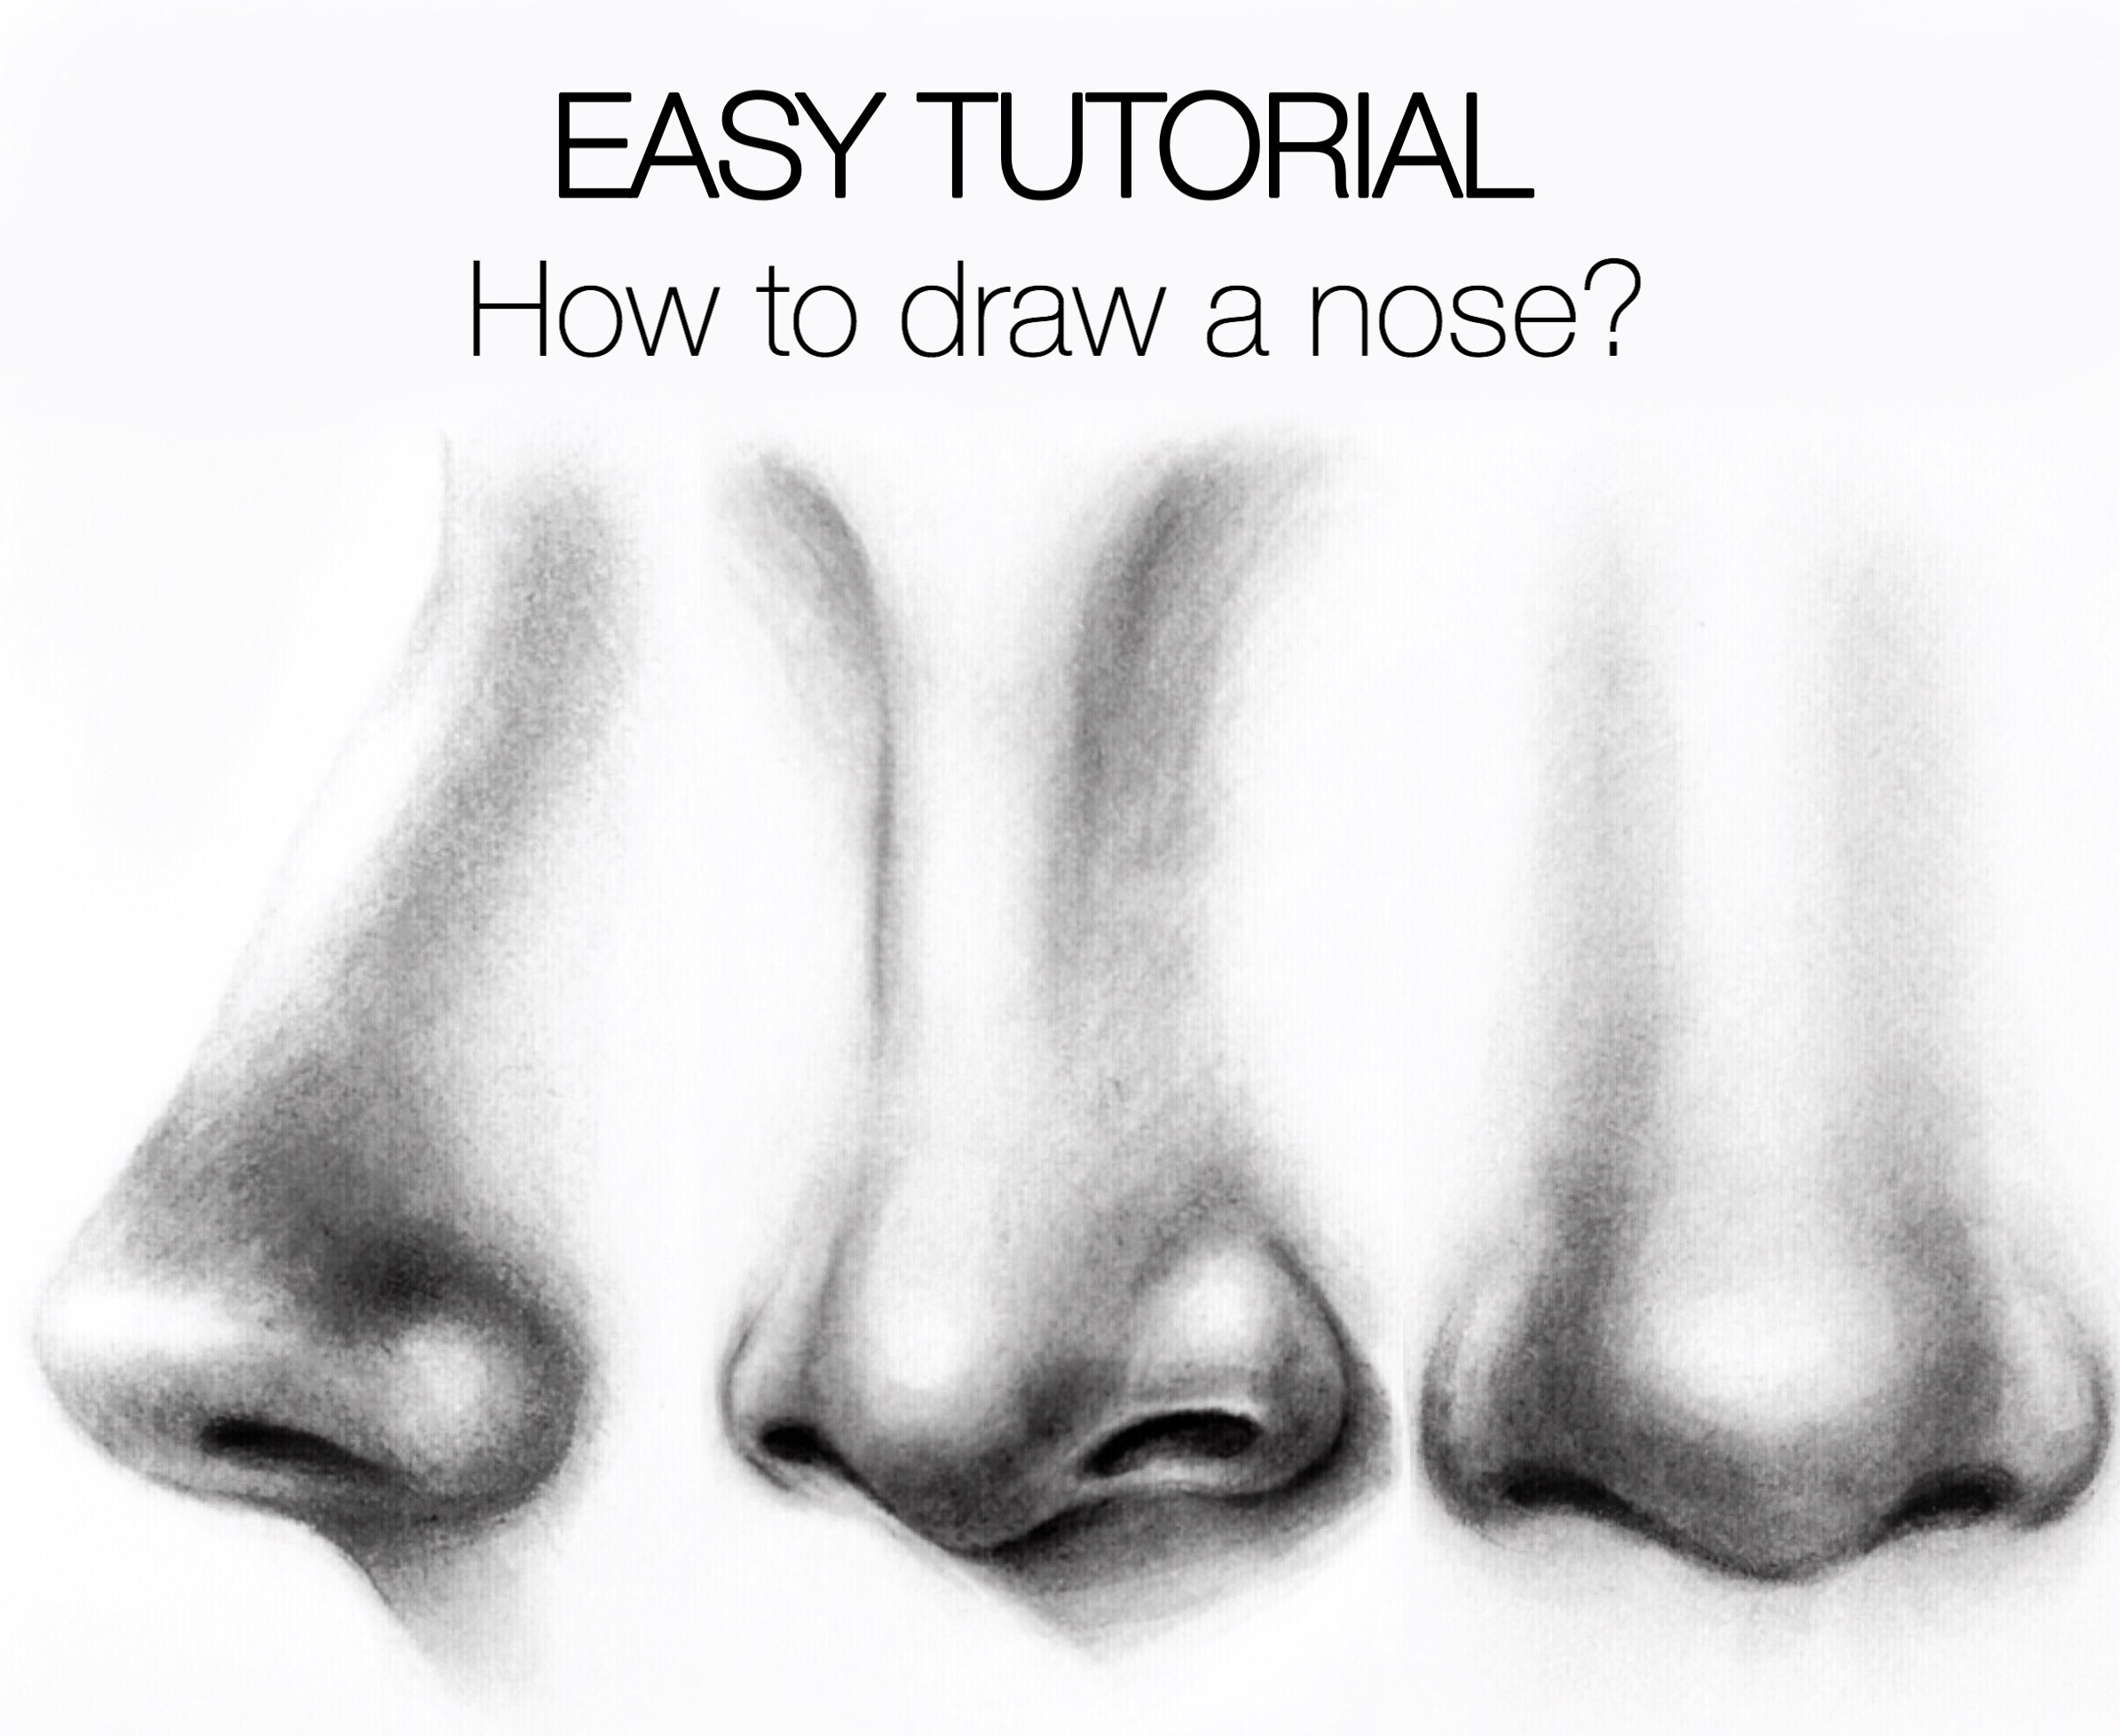
Drawing Noses from All Angles
A nose does not always face straight ahead, does it? People move their heads, and you will want to draw noses from the side, or looking up, or looking down. This can seem a bit tricky at first, but there are some great ways to make it much easier. It is all about understanding how the nose turns in space, which is that.
Using the Pyramid Guide
One really clever trick for learning how to draw a nose from different angles is using a pyramid shape as a guide. Think of the nose, in its most basic form, as a pyramid sticking out from the face. This simple idea can help you visualize how the nose changes as the head turns, you know?
If the head is looking down, the top plane of your imaginary pyramid will be more visible, and the bottom less so. If the head is looking up, it is the opposite. This pyramid guide helps you keep the nose's overall form consistent, no matter the perspective, which is very helpful. You can follow this tutorial with examples and tips for both realistic or even cartoonish noses, too. It is a flexible way to approach the challenge, you see.
This method gives you a solid framework for placing the nose's main features, like the tip and the nostrils, in the correct spot for any view. It makes the whole process of drawing noses from various perspectives feel much less daunting, honestly. Just imagine that simple shape, and you are pretty much there, you know?
Seeing Surface Direction
Beyond just the overall shape, understanding the surface direction of the nose is very important for drawings that look real and stylish. This means noticing which way the different parts of the nose are facing, like if a part is pointing slightly up, or down, or to the side, you know?
Each little plane or curve on the nose has its own direction, and these directions tell you how light will hit it. For example, the top plane of the bridge might face slightly forward, while the underside of the tip faces down. Recognizing these subtle shifts helps you define the form with your shading, which is that. It is about truly seeing the three-dimensional nature of the nose, you see.
This attention to surface direction is what really makes a nose drawing pop and look like it has volume. It is a bit like sculpting with your pencil, where you are defining how the form turns and catches the light. This level of observation is a skill that gets better with practice, and it makes a big difference in the end result, you know?
Bringing Your Nose to Life with Shading
Shading is where your nose drawing really starts to get some life and depth. It is not just about making things dark, but about showing how light falls on the nose and how its different forms create shadows. This part of the process can be very rewarding, as you see your drawing gain volume, you know?
Gradual Layering for Depth
The tutorial covers shading techniques, emphasizing gradual layering. This means you do not just press hard with your pencil to get a dark shade. Instead, you build up the darkness slowly, adding many light layers of pencil strokes one on top of the other, so. This approach gives you much more control over the tones, and it allows for smooth transitions between light and dark areas, which is very important for realism.
Think of it like painting, where you add thin washes of color to build up richness. With pencils, you are doing the same with graphite. This gradual method helps avoid harsh lines or patchy shading, making your nose look much more natural and soft, you know? It takes a bit of patience, but the results are definitely worth it, you see.
Light and Shadow for Realism
To create realistic contrasts, you need to use light and shadow effectively. This is not just about making dark areas dark and light areas light. It is about understanding where the light source is coming from and how that light interacts with the nose's form, you know? The parts of the nose facing the light will be brighter, and the parts turned away will be in shadow, that is.
But it is more than just light and dark. There are also mid-tones, reflected light within shadows, and subtle changes in tone that define the nose's curves. The tutorial helps you with this, showing how to use these elements to create a sense of form and volume. It is really about observing how light behaves in the real world and trying to capture that on your paper, which is quite fascinating.
This understanding of light and shadow is what truly makes a drawing look three-dimensional. It is what separates a flat drawing from one that seems to pop off the page. Paying close attention to these details will make a big difference in how real your noses appear, you know?
Refining Shadows and Highlights
To finish off your drawing, you will want to refine shadows and highlights. This is the stage where you go back and make your darks a bit darker where needed, and really make your lights sparkle. It is about adding those final touches that bring everything together, you see.
Highlights are usually the brightest spots where the light hits directly, and they can be quite small but very impactful. Shadows, on the other hand, might have subtle variations within them, like reflected light from the skin or surrounding objects. By adjusting these, you can make the nose look incredibly lifelike, you know? This refining step is where you add that extra bit of polish, which is that.
It is like putting the finishing touches on a sculpture. These small adjustments can make a huge impact on the overall realism and appeal of your nose drawing. It is a really satisfying part of the process, as you see all your hard work come to life, you know?
From Realistic to Stylized Noses
The beauty of learning these basic techniques is that they are not just for drawing super realistic noses. Once you understand the underlying structure and how light works, you can easily adapt these skills to create stylized or even cartoonish noses, too. It is all about knowing the rules so you can bend them creatively, you know?
Whether you want to draw noses that look exactly like real ones, or ones that are simplified and expressive, the principles of basic shapes, planes, and shading still apply. You just choose how much detail and how much realism you want to include. This flexibility makes learning nose drawing even more fun, you see. It means your artistic voice can shine through, regardless of the style you choose, which is that.
So, master the art of nose drawing, from basic anatomy to intricate details. You can learn to draw noses realistically or in a stylized way. This knowledge is perfect for beginners and pros alike. You can explore various angles and lighting effects, knowing you have a solid foundation, you know?
The Importance of Practice
Drawing noses may seem intimidating at first, but honestly, you do not need to worry about that. The more you practice, the better you will get. It is truly that simple. Every line you draw, every shadow you attempt, helps build your skill and confidence, you know?
This step-by-step tutorial and video will show you how to make drawing this tricky facial feature much easier. The tricks for learning how to draw a nose are within this easy guide for kids, too. You can learn how to draw a great looking nose with easy drawing instructions and a video tutorial. By following the simple steps, you too can easily draw a perfect nose, you see.
It is like learning any new skill; consistency is key. Set aside some time regularly to practice, even if it is just for a few minutes each day. You will be amazed at the progress you make over time, and how much more comfortable you become with drawing noses from any angle, you know? Remember, drawing is a journey, not a race, which is that.
Conclusion
Learning how to draw a nose, whether for realistic portraits or fun cartoons, is a skill that truly helps your overall drawing abilities. It is about understanding shapes, light, and how things fit together. By starting with simple forms, grasping the structure, and then adding careful shading, you can create noses that look solid and believable, you know?
This tutorial shows an easy approach to drawing different types of noses. It includes step-by-step pencil drawing examples and simple instructions. You can see how drawing noses in any style can be broken down into basic shapes, step by step with pictures. Mastering the art of nose drawing takes time and practice, and that is a good thing, you see.
Dive into the world of drawing noses with our collection of 40 instructional video lessons. Learn techniques to capture the shape, shadows, and proportions of the nose. Start drawing realistic noses with confidence! You can find more art supplies and tools at Art Supplies Central, which might help your journey. Learn more about drawing faces on our site, and link to this page for more advanced techniques.
Frequently Asked Questions About Nose Drawing
How do you draw a nose step by step for beginners?
A good way to start is with a simple circle for the nose tip. From there, you add bridge lines and adjust horizontal lines to define the overall shape. Then, you can use basic shapes and planes to build the structure before adding shading, you know? It is all about building it up piece by piece, which is that.
What are the basic parts of a nose for drawing?
The main parts you will want to know are the nose tip, the bridge, the nostrils, and the wings of the nose. Understanding these helps you place features correctly and see how light will fall on them, you see. Knowing these basic areas makes it much easier to draw a nose that looks correct, very.
How do you shade a realistic nose?
For realistic shading, focus on gradual layering. Build up your tones slowly with many light pencil strokes instead of pressing hard right away. Pay close attention to where the light source is coming from to create realistic contrasts between light and shadow, and then refine your highlights and darkest shadows for that final touch, you know? This method really helps create depth, too it's almost.
How to draw nose (front view)? | LOV4ARTS | Easy drawing techniques
How to draw a nose for beginners with these tutorials that will help you
70+ Easy Nose Drawing Ideas 2025 | HARUNMUDAK

