How To Make Onigiri: Your Guide To Perfect Japanese Rice Balls
Have you ever wanted to bring a little piece of Japan right into your kitchen? Well, learning how to make onigiri is a truly fun way to do just that. These classic Japanese rice balls, sometimes called musubi, are more than just a snack; they are a taste of comfort, often lovingly prepared by family members for trips or lunchtime bento boxes. You can put almost anything in these rice balls, and they are very satisfying, offering a wonderful taste experience.
Making onigiri at home gives you so much freedom to play with tastes and shapes. Think about different seasonings, a variety of fillings, and even how you want them to look. It is a really creative process, actually, and quite rewarding when you get it right. You get to pick the very best rice, figure out the right way to store them, and then just enjoy these handy little snacks whenever you want them, you know?
This article will show you everything you need to know to make these traditional Japanese rice balls right in your own home. We will talk about common ingredients, popular fillings, and some truly useful tips for getting them just right. This easy onigiri recipe is perfect for beginners, too, so you can make quick and delicious treats that are flavored with delightful Japanese seasonings, often wrapped up in charming nori strips.
Table of Contents
- What is Onigiri?
- Why Make Onigiri at Home?
- Getting Started: Essential Ingredients
- Popular Onigiri Fillings
- Shaping Your Onigiri
- Step-by-Step: How to Make Onigiri
- Tips for Perfect Onigiri
- Beyond the Basics: Yaki Onigiri
- Frequently Asked Questions About Onigiri
What is Onigiri?
Onigiri, also sometimes called musubi, is basically a rice ball made by cooking and then filling sushi rice. You see these everywhere in Japan, for example, especially at convenience stores or in bento boxes. They are truly a common treat at picnics, too, and just about anywhere you might need a handy bite to eat.
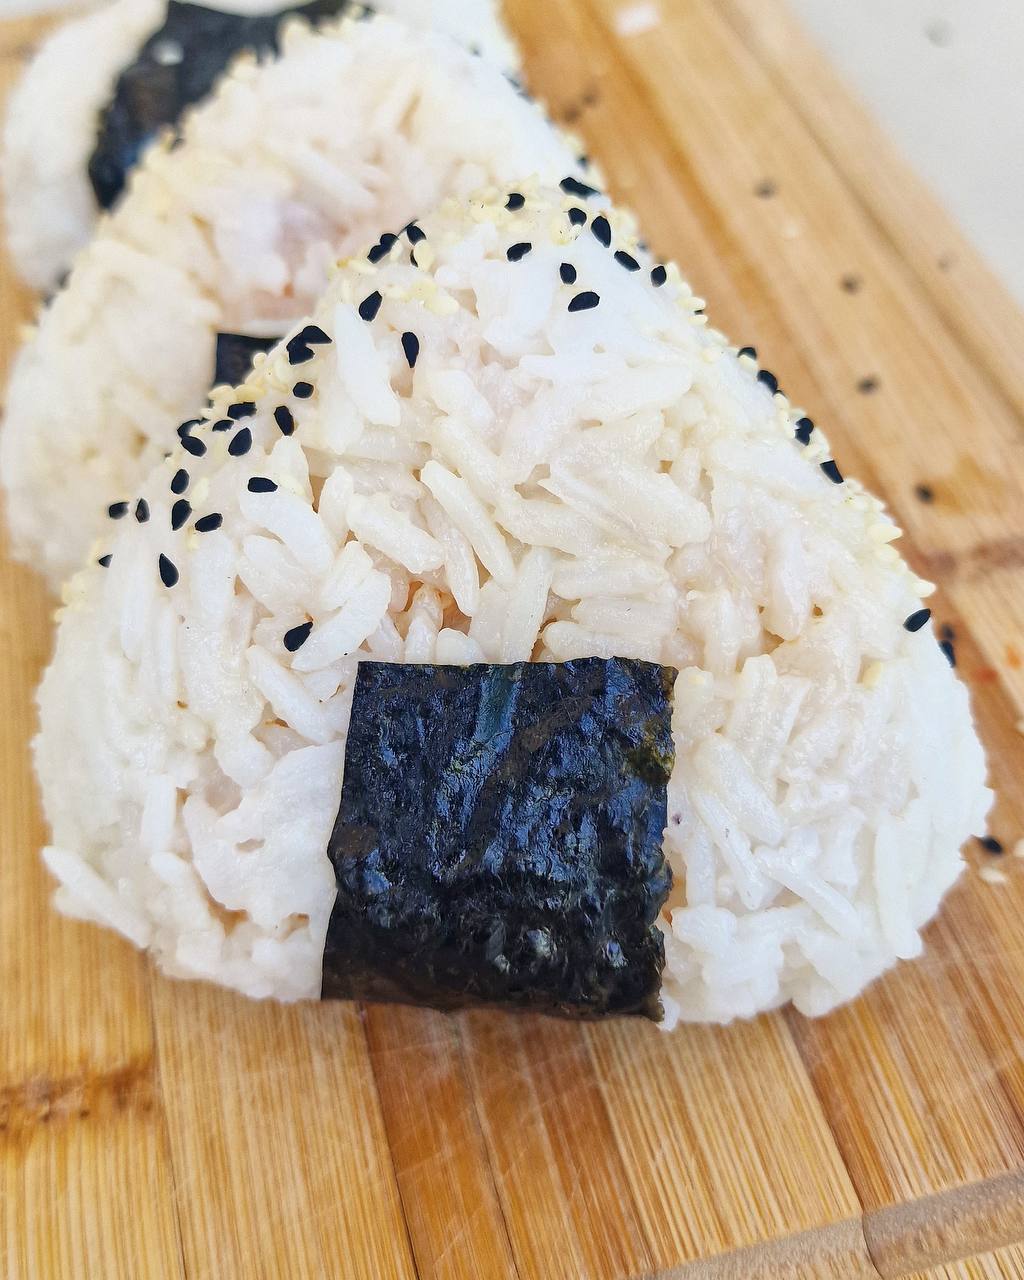
These are fluffy shaped rice balls, often wrapped in nori, which is that green seaweed sheet. They come packed with a variety of different savory fillings, so you can have something new every time. It is an easy way to carry your food, you know, and really tasty.
Why Make Onigiri at Home?
Making onigiri at home gives you full control over what goes into your food, which is pretty great. You can pick exactly the ingredients you like and make sure everything is fresh. This also means you can adjust the tastes to suit your own preference, so you can make them just the way you want, basically.
It is also a truly fun activity, particularly for those who enjoy cooking Japanese food outside of Japan. You might find it easier to get ingredients in Europe, for instance, and still make something very authentic. Plus, there is a special feeling that comes from making food for yourself or your loved ones, especially something like onigiri, which has that homemade, caring touch.
Getting Started: Essential Ingredients
Good onigiri is really all about the rice and how it is prepared, so that is where we will start. You need just a few common ingredients to begin this food adventure. Getting these things right sets you up for success, so pay attention to these first steps, you know?
Choosing the Right Rice
The best rice for onigiri is a short-grain Japanese rice, often labeled as sushi rice. This type of rice has just the right stickiness when cooked, which is very important for shaping. It holds together well, but it is not too mushy, so that is something to keep in mind.
You want to rinse your rice very well before cooking it. Do this several times until the water runs clear. This gets rid of extra starch, which helps the rice cook up nicely. Then, cook it according to the package directions, usually in a rice cooker, which is the easiest way, or on the stovetop, if you prefer.
Key Seasonings
Once your rice is cooked and still warm, you will want to season it. A common seasoning mix for onigiri rice often includes rice vinegar, a little sugar, and some salt. This gives the rice a subtle, pleasant taste that complements the fillings, so it is a good idea to try it.
You can also just use salt, if you want a simpler flavor. Some people like to mix in a bit of furikake, which is a dry Japanese seasoning blend, right into the rice itself. This adds a lot of taste and color, making your onigiri look and taste even better, you know?
Popular Onigiri Fillings
This is where the fun really begins, because you can put almost anything in these rice balls. The versatility of onigiri is one of its truly great features. You can go with classic tastes or get really creative, which is pretty exciting, you know?
Classic Choices
For classic onigiri, some popular fillings include canned tuna mixed with mayonnaise. This is a creamy, savory choice that many people love. Salmon, either cooked and flaked or even smoked, is another very popular option, often giving a rich, buttery taste.
Okaka, which is dried bonito flakes mixed with soy sauce, provides a deep umami taste that is very Japanese. Another good one is teriyaki chicken, chopped into small pieces. These are all traditional and widely enjoyed, so you might want to start with one of these, actually.
Creative Ideas
Beyond the classics, your imagination is the limit. You could try pickled plum (umeboshi) for a sour and salty kick. Some people use grilled cod roe (mentaiko) for a spicy, savory filling. You could even use leftover stir-fry or finely chopped vegetables, if you want.
You can also just eat the rice ball plain, or roll it in crispy furikake or sesame seeds for an outside coating. This adds a different texture and flavor without needing a separate filling inside. The idea is to have something that tastes good with rice, so think about what you enjoy, you know?
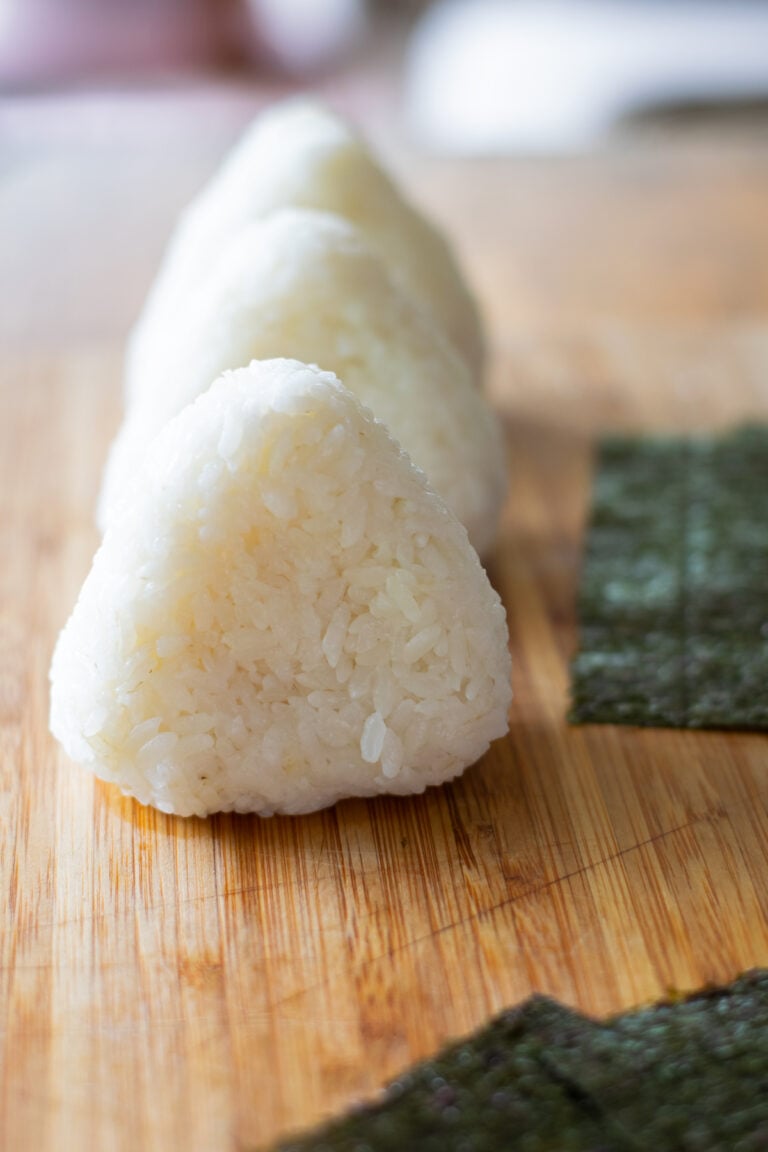
Shaping Your Onigiri
Shaping onigiri is a bit of an art, but it is also something anyone can learn. You want to make them firm enough to hold together, but not so squished that the rice becomes hard. There are a couple of main ways to do this, basically, so you can pick what feels best for you.
Hands-On Method
To shape onigiri by hand, first, wet your hands with a little water to keep the rice from sticking. Then, put a pinch of salt on your palms; this helps season the outside of the rice and also acts as a barrier. Take a portion of warm, seasoned rice, about half a cup, and make a small hollow in the middle for your chosen filling.
Place a small amount of filling in the hollow, then gently bring the rice up around it to cover the filling completely. Now, you can shape it into a triangle, a cylinder, or a round ball. Use gentle but firm pressure, turning the rice ball as you shape it. It takes a little practice, but it is quite satisfying when you get the feel for it, you know?
Using a Mold
For beginners, or if you want perfectly uniform shapes, a rice mold is a truly helpful tool. These molds usually come in triangle or round shapes. You simply wet the mold, put about half the rice in, make a space for the filling, add the filling, then top with more rice.
Press down with the mold's lid or top piece, and then push the onigiri out. This method makes shaping much quicker and easier, especially if you are making a lot of them. It is a really good way to get consistent results every time, so you might want to try one, too.
Step-by-Step: How to Make Onigiri
Here is a simple way to make delicious onigiri, combining all the things we have talked about. This is a pretty straightforward process, so you should find it easy to follow along, you know?
Prepare the Rice: Start with good quality short-grain Japanese rice. Rinse it several times under cold running water until the water is clear. Cook the rice according to your rice cooker's instructions or on the stovetop. Let it sit covered for about 10 minutes after cooking.
Season the Rice: While the rice is still warm, transfer it to a wide, shallow bowl. If you are using a rice vinegar mixture, gently fold it into the rice. If just using salt, you will add it to your hands later. The rice should be warm enough to handle, but not too hot, basically.
Prepare Your Workspace: Get a small bowl of water ready for wetting your hands. Have a little salt in another small bowl if you are shaping by hand. Also, prepare your chosen fillings and have strips of nori ready if you plan to wrap them.
Shape the Onigiri (Hand Method):
- Wet your hands slightly with water and put a tiny bit of salt on your palms.
- Take about half a cup of seasoned rice. Form it loosely in one palm.
- Make a small dip in the center of the rice with your thumb.
- Place a spoonful of your chosen filling into the dip.
- Bring the rice around the filling to completely enclose it.
- Gently press and shape the rice into your desired form – a triangle, ball, or cylinder. Rotate the rice as you press to make it even. Aim for a firm, but not overly compressed, shape.
Shape the Onigiri (Mold Method):
- Lightly wet the inside of your onigiri mold.
- Spoon about half the rice into the mold. Make a small indentation in the center.
- Add your filling into the indentation.
- Cover the filling with the remaining rice.
- Place the mold's top piece on and press down firmly to shape the onigiri.
- Remove the top piece and push the onigiri out of the mold.
Add Nori or Toppings: If you like, wrap a strip of nori around the onigiri. You can also roll the outside of the onigiri in furikake or sesame seeds for extra taste and texture. This is a nice touch, too, for appearance.
Serve and Enjoy: Onigiri is best enjoyed fresh, but it can also be packed for later. They are perfect for bento boxes, picnics, or just a quick snack at home. Learn more about Japanese cuisine on our site, and you might like this page about Japanese bento box ideas.
Tips for Perfect Onigiri
Making truly good onigiri is about more than just the steps; it is also about some little tricks that can make a big difference. These tips will help you get that perfect taste and texture every time, you know, and avoid some common issues.
Rice Preparation Pointers
The rice is the heart of onigiri, so getting it right is very important. Always use freshly cooked, warm rice; cold rice is much harder to shape and does not taste as good. If your rice cools too much, you can gently warm it up a little in the microwave, but be careful not to dry it out, basically.
When you mix seasonings into the rice, use a cutting motion with a rice paddle or spoon rather than stirring. This keeps the rice grains from getting crushed, which helps keep that fluffy texture. Do not overmix, just enough to combine everything, so it is a quick process.
Storage and Enjoyment
Onigiri is best eaten within a few hours of making it. If you need to store them, wrap each one individually in plastic wrap to keep the rice from drying out. Then, put them in an airtight container. You can keep them at room temperature for a few hours, or in the fridge for up to a day, but the rice might get a little hard in the cold, you know?
If they do get hard from being in the fridge, you can gently warm them up in the microwave for a short time to soften the rice again. Onigiri is a common treat in bento boxes and at picnics, so they are designed to be portable and eaten at room temperature, which is pretty handy.
Troubleshooting Common Issues
Sometimes, things do not go exactly as planned, and that is okay. If your onigiri falls apart, it might be that your rice is not sticky enough, or you are not pressing it together firmly enough. Try adding a little more pressure when shaping, or make sure you are using true sushi rice, so that could be it.
If the rice sticks too much to your hands or the mold, make sure your hands or the mold are properly wet with water and a little salt. If the onigiri tastes bland, you might need a bit more seasoning in the rice or a more flavorful filling. You can always adjust these things as you go, basically.
Beyond the Basics: Yaki Onigiri
Once you are comfortable with making regular onigiri, you might want to try something a little different, like yaki onigiri. This is a grilled rice ball that has a truly crispy crust and a lovely caramelized glaze. It is an irresistible snack or side dish, and it adds a whole new dimension to your onigiri skills.
To make yaki onigiri, you first shape your rice balls as usual, often without a filling inside, or with a simple one. Then, you brush them with a mixture of soy sauce, mirin, and a touch of sugar. After that, you grill them until they are golden brown and slightly crispy on the outside. It is a really tasty variation, and you can find many recipes online for this, like on Just One Cookbook.
Frequently Asked Questions About Onigiri
What kind of rice do you use for onigiri?
For onigiri, you should use short-grain Japanese rice, often sold as sushi rice. This type of rice has the right amount of stickiness after cooking, which helps the rice balls hold their shape. It is important to rinse it well before cooking, so it is not too starchy.
Do you eat onigiri hot or cold?
Onigiri is typically eaten at room temperature, or sometimes slightly warm. They are designed to be portable snacks for bento boxes or picnics, so they taste good even when they are not hot. If you store them in the fridge, you can gently warm them up a little to soften the rice before eating, if you like.
How long does onigiri last?
Onigiri is best enjoyed fresh, within a few hours of making them. If you need to keep them longer, wrap each one tightly in plastic wrap and store them in an airtight container. They can stay at room temperature for a few hours, or in the refrigerator for up to one day. After that, the rice can become quite hard and less pleasant to eat.
Making onigiri is a truly rewarding experience, offering a simple way to enjoy a taste of Japan. Whether you prefer them plain, wrapped in nori, or coated in sesame seeds, onigiri offers something for everyone. So, go ahead and try making these delightful rice balls; you might just find your new favorite snack!
Salmon Onigiri - Ana.Recipes
Easy Onigiri Recipe (Japanese Rice Balls) for Beginners - eyes and hour

Miso beef onigiri – Artofit

