Learn How To Braid Hair: Your Complete Beginner's Guide
Welcome to the amazing world of hair braiding, a truly creative project you get to carry around with you on your head, in a way. This skill is not just for fancy occasions; it's a super practical way to keep your hair neat and styled, especially when you're busy or active. For anyone wondering how to braid, you've certainly come to just the right spot, honestly.
Braiding your own hair can be a really great way to express yourself creatively, and it saves a lot of time too, you know? It's a simple weaving method that turns your hair into something you can really show off. Plus, braids are extremely useful for keeping your hair secure during physical activity, which is pretty neat.
Everyone has to start somewhere, and for hair braiding, the basic three-strand braid is absolutely the perfect first step. Whether you're totally new to this or just want to refresh your skills, learning different braid types can change your whole hairstyling routine. We'll share how to do several types of braids for beginners right here, so.
Table of Contents
- Welcome to Braiding: Your Hair Craft Project
- Getting Ready to Braid: Essential Preparations
- The Three-Strand Braid: Your First Step
- Learning the Classic French Braid
- Mastering the Dutch Braid (Inside-Out Braid)
- Going Beyond the Basics: Other Braids to Explore
- Frequently Asked Questions About Braiding
Welcome to Braiding: Your Hair Craft Project
Braiding is a really simple weaving technique used for all sorts of things, from hair to ribbons, even flowers, that is. It's truly a skill you can carry with you, literally, on your head. Many people find braiding their own hair to be a wonderful creative outlet, which is nice.
This skill is very practical for keeping your hair out of the way during physical activities, like sports or just a busy day, you know. But it also lets you create a hairdo you can proudly show off. Once you get the basic technique down, you can move on to all sorts of other, more complicated braid types, pretty much.
If you're looking for clear guidance on how to braid hair, we've got you covered here, too. We'll walk you through everything, from understanding the different types of braids to getting your hair ready. It's really not always easy to braid your own hair at first, but don't worry, we're here to help you learn.
Getting Ready to Braid: Essential Preparations
Before you even begin to weave your hair, a little bit of preparation can make a really big difference, in a way. Getting your hair ready properly helps your braid come out neater and makes the whole process much easier to handle. This is especially true for absolute beginners, so.
Tools You Might Need
You don't need a ton of fancy equipment to start braiding, which is good. A good brush or comb is essential for smoothing out your hair and removing any tangles. Hair ties, sometimes called elastic bands, are also very important for securing your braids once they are done, or for creating a base.
Some people find a fine-tooth comb helpful for making very clean parts and sections, you know. A mirror, or even two mirrors if you can manage it, will let you see what you're doing at the back of your head, which is super helpful when you're learning to braid your own hair, honestly.
Preparing Your Hair
Clean, dry hair is generally the best to work with for most braids, that is. Hair that's a day old can sometimes have a bit more grip, making it easier to hold sections. If your hair is very slippery or fine, you might want to use a little bit of texturizing spray or dry shampoo to give it some hold, just a little.
Always brush or comb through your hair thoroughly before you start, very, very. Any knots or tangles will make braiding much harder and can pull on your hair, which isn't fun. Smooth hair allows for clean sections and a much neater final braid, you know.
Parting Your Hair for Different Looks
How you part your hair depends a lot on how you want your finished braid to look, actually. You can have a braid that falls down your back, a side braid, or even pigtail braids on either side of your head, which is pretty cool. The possibilities are nearly endless once you get the hang of it, so.
For a single braid down your back, you might just pull all your hair back. For a side braid, you'd part your hair on one side and bring all the hair over to that shoulder. Pigtail braids, of course, need a clean part down the middle of your head, that is. Think about the style you want before you begin to part your hair, really.
The Three-Strand Braid: Your First Step
Everyone has to start somewhere, and when it comes to the world of braiding, the three-strand braid is absolutely the ultimate first step, you know. This is the fundamental technique that all other braids, like French and Dutch, build upon. Learning this basic braid is key to going wild with other, more intricate styles later on, that is.
Starting with a Ponytail for an Easy Base
For absolute beginners, tying your hair into a ponytail first can make a truly secure base, which is very helpful. If you tie your hair into a ponytail or even a half ponytail with a hair tie, your braid will be much easier to handle and will probably come out neater, too it's almost. This method gives you a fixed starting point and keeps other hair out of the way.
It's a really good way to practice the hand movements without worrying about keeping all your hair together, you know. Once you've gotten the hang of braiding starting with a ponytail, you can then move on to braiding loose hair, perhaps starting at the nape of your neck, which is a bit more challenging but totally doable.
Moving to Loose Hair Braiding
After you feel pretty comfortable with braiding from a ponytail, you're ready to try braiding loose hair. This means starting your braid directly from your scalp or from a section of hair that isn't tied up. It takes a little more coordination, but it opens up so many more styling options, that is.
When you braid loose hair, you'll need to pay extra attention to keeping your sections clean and even, you know. This is where a good comb and a mirror can really help. Don't get discouraged if it feels a little tricky at first; practice really does make a difference, apparently.
Step-by-Step: The Classic Three-Strand Braid
This is an easy to follow tutorial for braiding hair, specifically the three-strand braid, which is the very core of all braiding, you know. Pay attention to your hand placement; it's a really big part of getting it right. Here's how to braid hair for a variety of hair types and hairstyles at home, just a little.
Step 1: Get Your Hair Ready
First, make sure your hair is brushed very, very smooth. Any tangles will make it difficult to section and braid, you know.
Decide where you want your braid to be. For a simple practice braid, gather all your hair at the back of your head, or tie it into a low ponytail, as we talked about earlier, so.
Step 2: Divide Your Hair
Take the section of hair you want to braid. Divide this section into three equal parts. Try to make them as even as possible; this helps the braid look neat, you know.
Hold one section in your left hand, one in your right hand, and let the middle section hang free for a moment, that is. You'll use your fingers to keep them separated, pretty much.
Step 3: Begin Weaving – Left Over Middle
Take the left-most section of hair. Cross it over the middle section. The section that was originally on the left is now in the middle, and the section that was in the middle is now on the left, you know.
Make sure to keep a gentle, consistent tension as you cross the hair. This prevents the braid from becoming too loose or too tight, which is good.
Step 4: Continue Weaving – Right Over New Middle
Now, take the right-most section of hair. Cross it over the section that is now in the middle, which was originally the left section, that is.
The section that was on the right is now in the middle, and the section that was in the middle is now on the right. You're essentially creating a continuous 'X' pattern with your hair, so.
Step 5: Keep Going
Repeat these two steps: always take the outer-most section and cross it over the new middle section. Alternate between the left outer section and the right outer section, you know.
Keep your fingers close to the part where the braid is forming to maintain control and neatness. This is where hand placement really matters, actually.
Step 6: Secure Your Braid
Continue braiding until you reach the end of your hair, or as far down as you want your braid to go, that is.
Once you've braided to your desired length, secure the end with a hair tie. Make sure it's snug enough to hold the braid without being too tight, you know.
Practice this basic braid many times. The more you do it, the more natural the hand movements will feel, which is very true. This really is the foundation for everything else, so take your time with it.
Learning the Classic French Braid
The French braid is a really beautiful and classic style that looks much more complicated than it actually is, you know. Once you understand the basic three-strand braid, adding hair as you go is the next logical step. Mastering this can truly transform your hairstyling routine, that is.
Getting Ready for Your French Braid
For a French braid, you typically start with loose hair at the top of your head, not a ponytail, which is different. Make sure your hair is very smooth and free of tangles. You might want to use a comb to make a clean section at the crown of your head, pretty much.
Decide if you want a central French braid, or perhaps two French braids that go down the sides of your head. Parting your hair correctly at the start is pretty important for the final look, you know.
How to Do a French Braid: Step by Step
This is a really helpful guide to master the classic French braid. It builds directly on your three-strand knowledge, which is good.
Step 1: Start Your First Section
Take a small section of hair from the top of your head, where you want your braid to begin. This section should be about two to three inches wide, depending on your hair thickness, you know.
Divide this initial section into three equal strands, just like you would for a regular three-strand braid, that is. Hold them securely.
Step 2: Begin the Basic Weave
Perform one or two crosses of a regular three-strand braid: cross the left strand over the middle, then the right strand over the new middle, you know.
This creates a small, secure base for your French braid, which is pretty neat.
Step 3: Add Hair to the Left Strand
Now, before you cross the left strand over the middle again, gather a small, new section of loose hair from the left side of your head, near your hairline, that is.
Add this new section of hair to the left strand you are currently holding. Combine them so they become one thicker strand, you know.
Step 4: Cross the Combined Left Strand
Cross this newly combined, thicker left strand over the middle strand. It will now become the new middle strand, pretty much.
Keep your fingers firm but gentle to maintain tension and keep the sections clean, which is good.
Step 5: Add Hair to the Right Strand
Similarly, before you cross the right strand over the middle, gather a small, new section of loose hair from the right side of your head, near your hairline, that is.
Add this new section of hair to the right strand you are holding. Combine them into one thicker strand, you know.
Step 6: Cross the Combined Right Strand
Cross this newly combined, thicker right strand over the middle strand. It will now become the new middle strand, so.
You'll notice the braid starting to lie flat against your head, which is the characteristic look of a French braid, you know.
Step 7: Continue Adding and Braiding
Repeat steps 3 through 6. Each time you bring an outer strand to the middle, you add a new, small section of loose hair from that side, that is.
Continue working your way down your head, incorporating all the loose hair into the braid. Try to keep the added sections even in size, pretty much.
Step 8: Finish the Braid
Once you've run out of loose hair to add, you will have just three main strands remaining. Finish the rest of the braid as a regular three-strand braid down to the ends of your hair, you know.
Secure the end with a hair tie. You can gently pull on the loops of the braid for a fuller, softer look, if you like, that is.
Tips for a Great French Braid
Maintaining even tension is really key for a neat French braid, you know. If your tension is too loose, the braid might sag; too tight, and it could pull uncomfortably. Try to keep your hands close to your head as you braid, which is pretty helpful.
Small, consistent sections of added hair make for a much smoother braid, that is. If you add too much hair at once, the braid can look bulky. If you're struggling to see the back of your head, practice in front of a mirror, or perhaps use a second mirror to see the back, you know. It truly just takes practice.
Mastering the Dutch Braid (Inside-Out Braid)
The Dutch braid is very similar to the French braid, but it creates a raised, "inside-out" effect, which is really cool. Instead of crossing strands over the middle, you cross them under. This makes the braid stand out more from your head, you know. It's another classic style to master in no time, that is.
Setting Up for Your Dutch Braid
Just like with the French braid, start with very smooth, tangle-free hair. You'll take an initial section of hair from the top of your head. Decide on your parting based on whether you want one large Dutch braid or two pigtail-style Dutch braids, pretty much.
A comb can help you make a very clean, crisp part. Having your hair slightly damp or using a little bit of styling cream can help keep flyaways down, which is good, especially for this kind of braid, you know.
How to Do a Dutch Braid: Step by Step
Here's how to do a Dutch braid, with hand placement and step-by-step guidance. It's essentially the French braid, but reversed, that is.
Step 1: Initial Sectioning
Take a section of hair from the top of your head, similar in size to what you'd use for a French braid, you know.
Divide this section into three equal strands. Hold them securely, one in your left hand, one in your right, and the middle one, pretty much.
Step 2: Begin the Under-Weave
Take the left-most strand and cross it *under* the middle strand. The left strand is now in the middle position, and the original middle strand is now on the left, that is.
Next, take the right-most strand and cross it *under* the new middle strand. The right strand is now in the middle, and the previous middle strand is now on the right, you know.
Step 3: Add Hair to the Left Strand (Under)
Before you cross the left strand under the middle again, gather a small, new section of loose hair from the left side of your head, near your hairline, that is.
Add this new section of hair to the left strand you are holding. Combine them into one thicker strand, you know.
Step 4: Cross the Combined Left Strand (Under)
Cross this newly combined, thicker left strand *under* the middle strand. It will now become the new middle strand, pretty much.
This under-crossing is what makes the braid pop out, so.
Step 5: Add Hair to the Right Strand (Under)
Similarly, before you cross the right strand under the middle, gather a small, new section of loose hair from the right side of your head, near your hairline, that is.
Add this new section of hair to the right strand. Combine them into one thicker strand, you know.
Step 6: Cross the Combined Right Strand (Under)
Cross this newly combined, thicker right strand *under* the middle strand. It will now become the new middle strand, that is.
You should see the braid starting to form on top of your hair, which is really cool.
Step 7: Continue Adding and Braiding
Repeat steps 3 through 6. Each time you bring an outer strand to the middle, you add a new, small section of loose hair from that side, but always crossing *under*, you know.
Work your way down your head, incorporating all the loose hair. Keep your added sections consistent in size for a neat look, pretty much.
Step 8: Finish the Braid
Once all the loose hair has been added, you'll have three main strands left. Finish the rest of the braid as a regular three-strand braid, but continue to cross the strands *under* each other, you know.
Secure the end with a hair tie. You can gently pull on the loops for a softer, more voluminous look, which is often done with Dutch braids, that is.
Helpful Hints for Dutch Braids
The main difference is truly just crossing under instead of over, you know. Focus on that one change, and the rest is very similar to the French braid. Keeping your hands close to your head and maintaining even tension are still super important, that is.
If you find it hard to keep the sections separate, try using your pinky finger to help divide the hair as you add new pieces, which can be very helpful. Practice makes perfect, and soon you'll be able to do
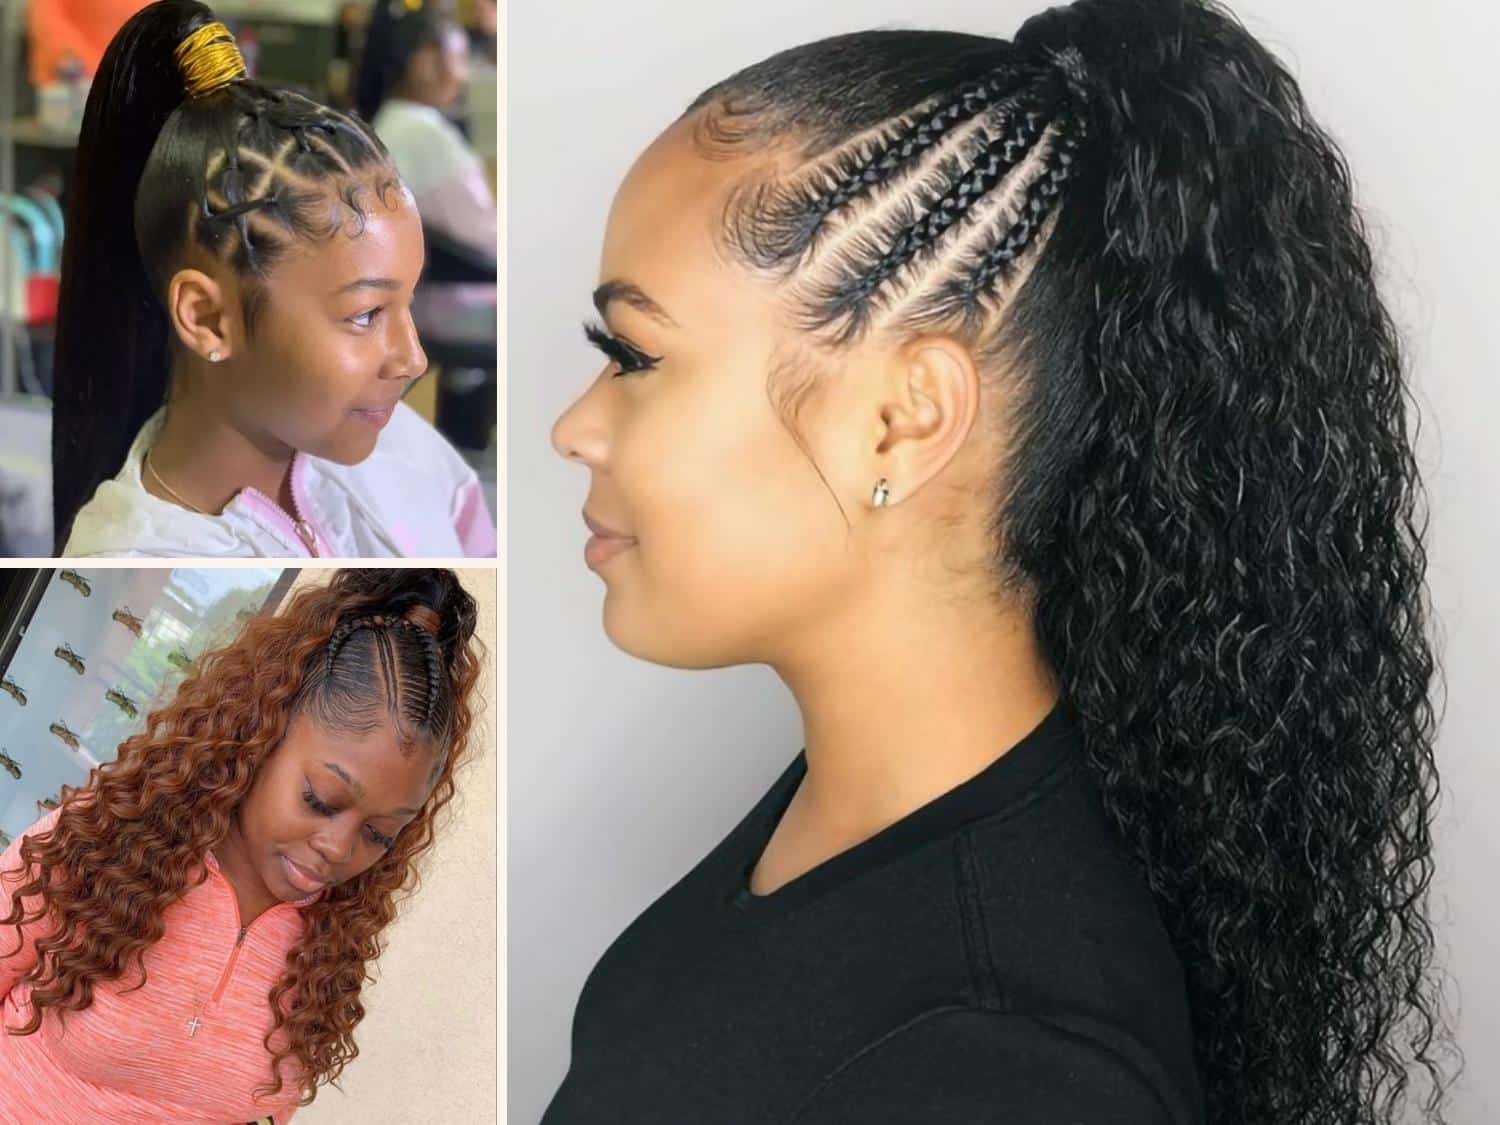
Styles - Braid Hairstyles
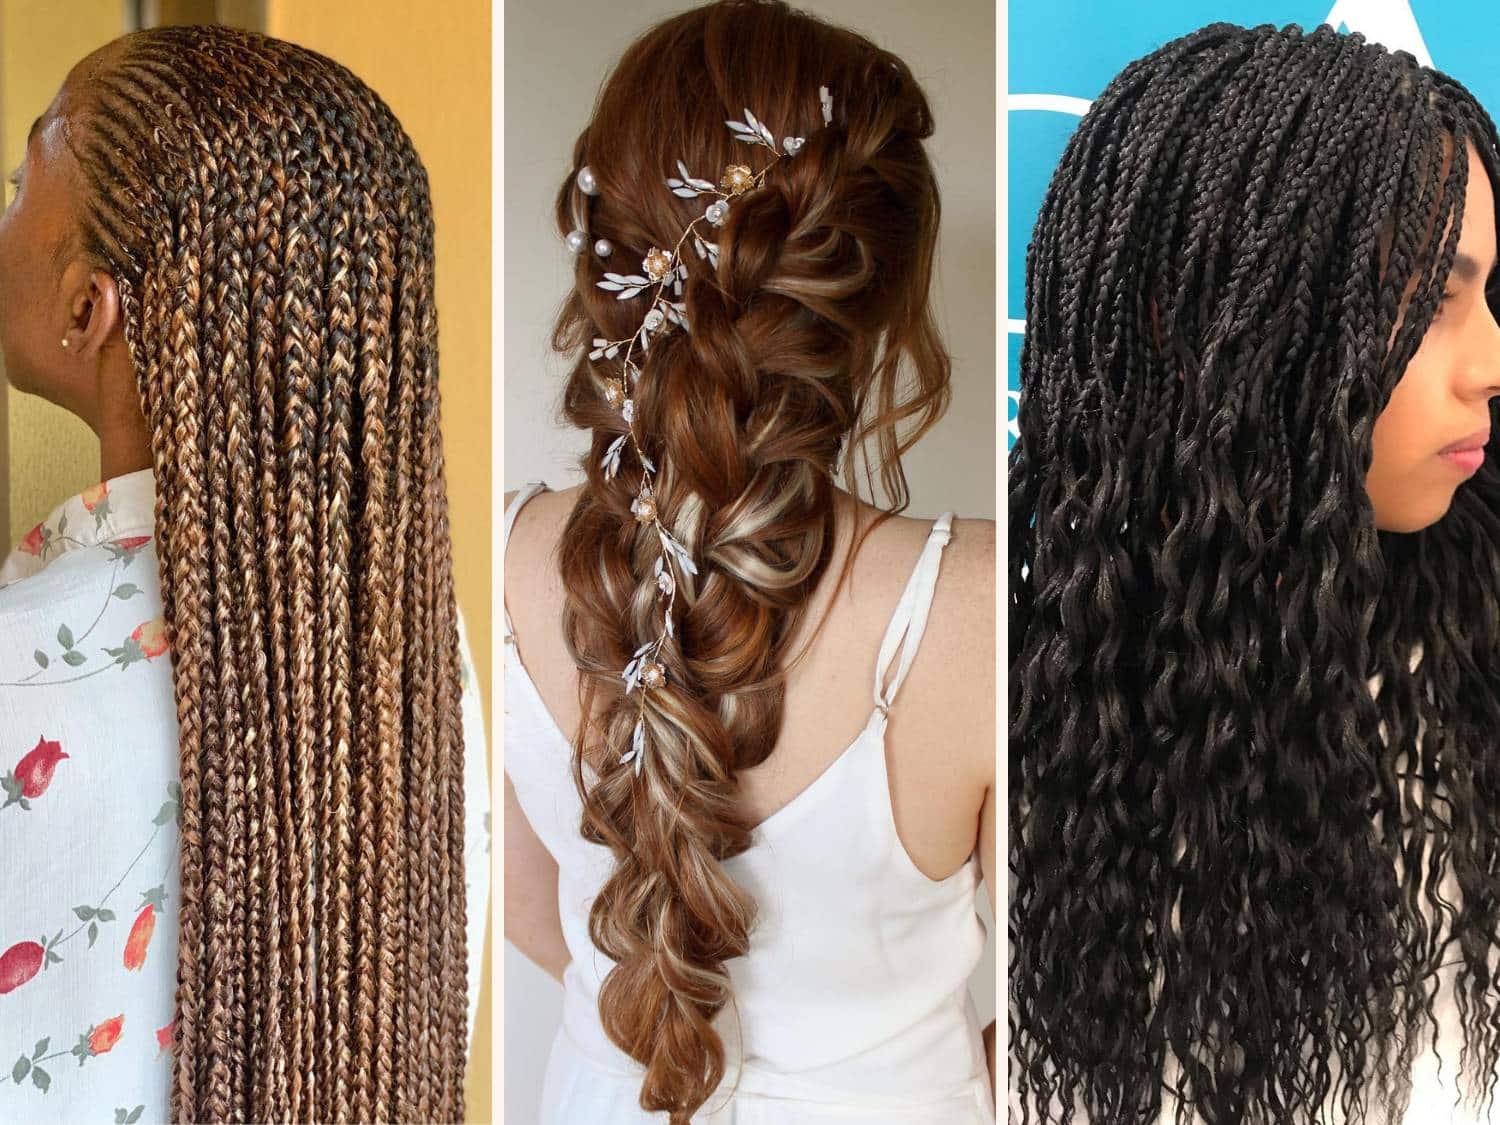
20 Weave Braid Hairstyles - Braid Hairstyles
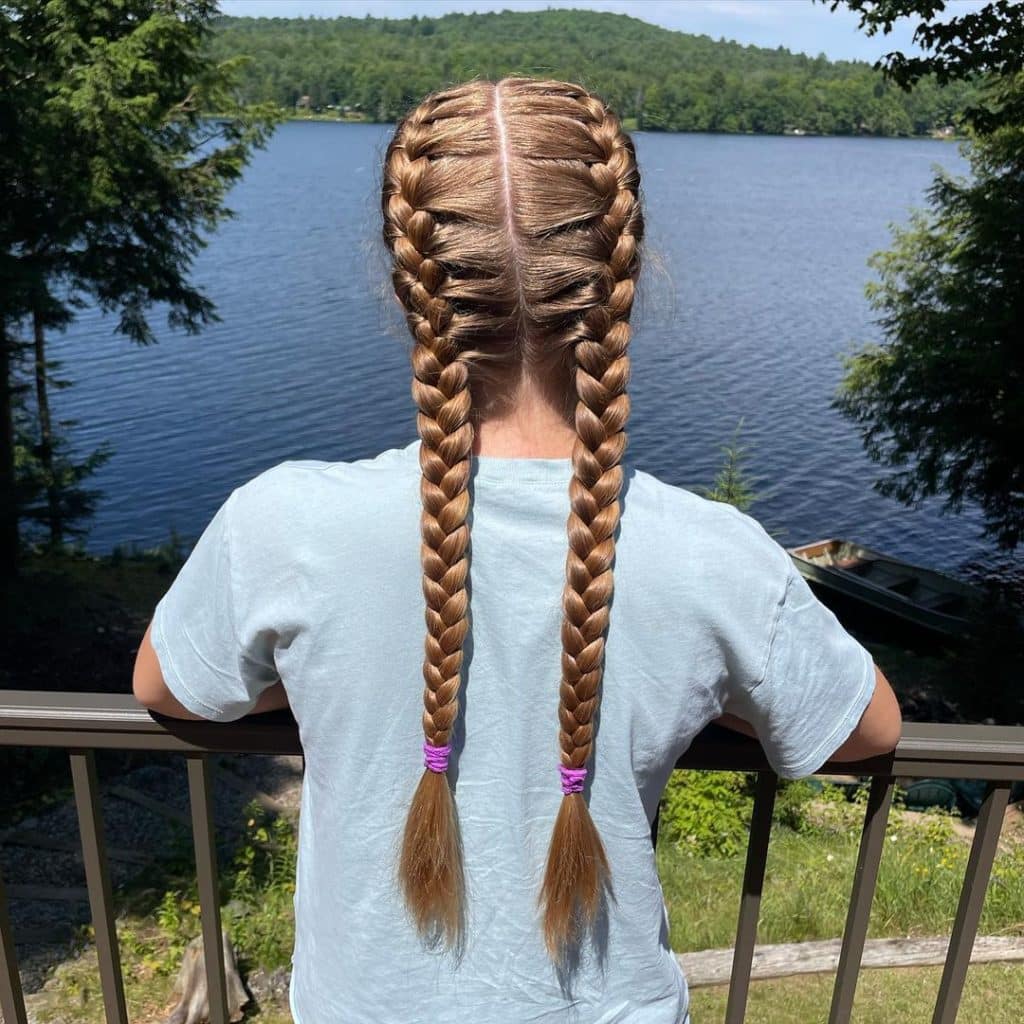
Cute French Braid Hairstyles: 20 Easy French Plaits With Pictures

